This manual is designed to cover all technical aspects of a CbPlus installation in a Carbonio CE Multi-Server environment. As one might expect, there are critical technical considerations to bear in mind when dealing with an environment where services are distributed across dedicated servers.
In this setup, CbPlus must be installed either a Server or as a Node. The Server acts as the central CbPlus instance, while the Node functions as an agent that runs on the other servers within the environment. Therefore, in a CbPlus architecture, there is only one Server, and all other instances are Nodes.
The role (Server or Node) is defined during the installation process.
Prerequisites
The first consideration is that you must have a working Carbonio Multi-Server deployment installed. Although CbPlus is highly flexible in managing multiple servers, we need to establish certain minimum criteria to ensure the environment operates flawlessly.
1 – The original environment installation followed the official Carbonio CE Multi-Server scenario guide published on the Zextras official website (for reference https://docs.zextras.com/carbonio-ce/html/install/scenarios/multi-server-scenario.html). This means the setup will consist of at least 5 servers, configured as follows:
Server1 – Mesh, Directory, Database, and Monitoring
Server2 – MTA AV/AS e Proxy
Server3 – Mailstore & Provisioning e Tasks
Server4 – Files, Docs and Editor, and Preview
Server5 – Chats e Video Server
2 – The CbPlus Server installation must be performed on the Proxy server of your Multi-Server deployment; thus, in the official scenario, this will be Server2.
3 – CbPlus is currently unable to manage two Proxy servers. If this applies to your setup, please contact support before proceeding.
4 – Ensure you have a valid root certificate installed. If you do not have one, the CbPlus installer can assist in generating and installing one using Let’s Encrypt.
CbPlus Server Installation
Access Server2, which is the server where the Proxy is installed. Download CbPlus normally and extract it to “/opt”.
Add your license key to the token.conf file, which should look something like this:
token=Adfr46sdadJKuTTZ1HGGD9EissOPoxY7bNRqThen execute the install command:
./install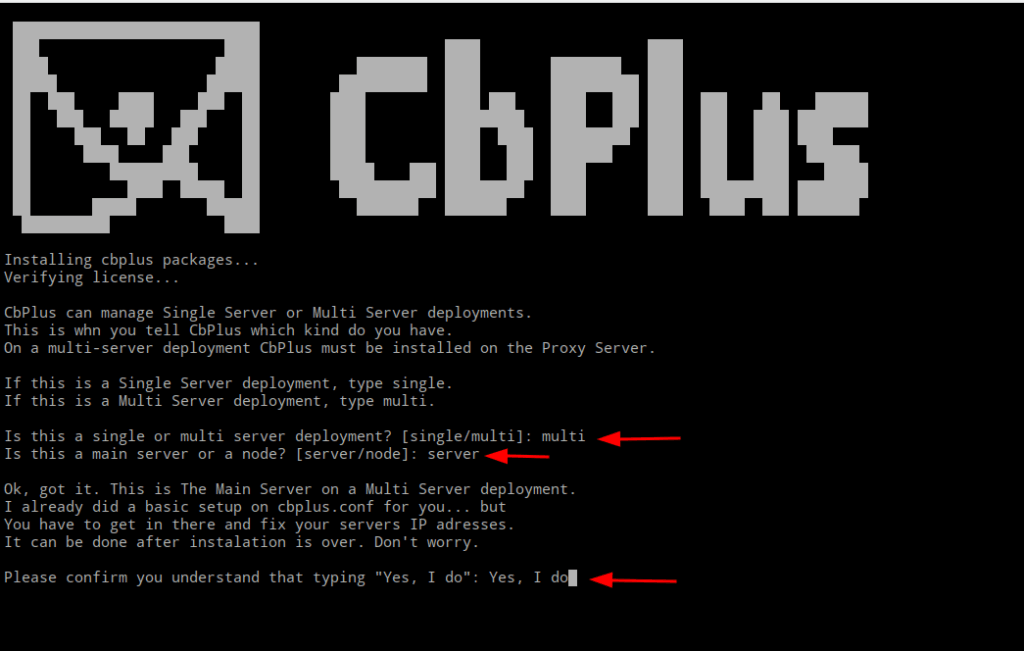
After the necessary packages are installed and the license is verified, the installer will request additional information regarding the Carbonio CE environment in which it will be deployed. In this case, we are installing the CbPlus Server on Server 2.
Follow the steps shown in the image: respond with “multi”, then “server”, and finally “Yes, I do” to proceed.
Explanation:
a) The first question concerns the type of deployment: Single-Server or Multi-Server?
b) The second question appears because the answer to the first question was “multi”. Now, the installer needs to know whether this is the CbPlus Server or a Node.
c) Since the answer is “server”, the installer provides a brief explanation about the importance of editing the cbplus.conf file and correctly setting the IP addresses of each server in the Multi-Server deployment. We will discuss the cbplus.conf file in more detail later.
If your installation does not yet have a valid certificate, the installer will assist you in creating one using Let’s Encrypt.
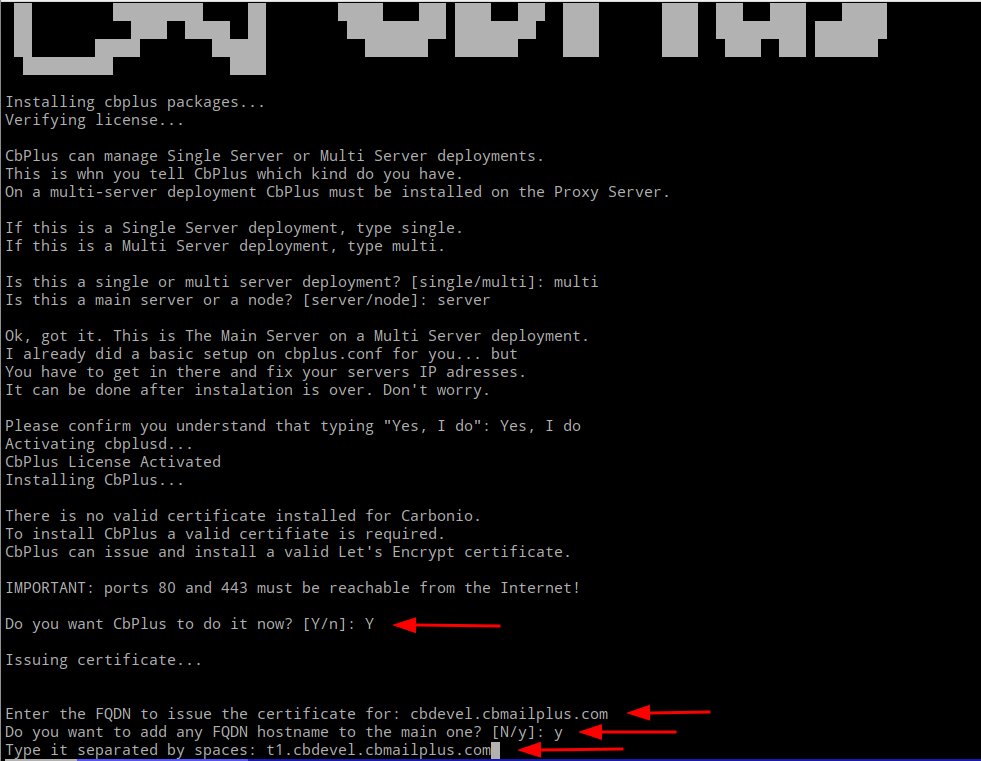
In a Multi-Server environment, it is common for servers to have generic names such as srv.dominio.com instead of the actual FQDN of the environment. In this case, the CbPlus installer allows you to specify the complete FQDN that must be resolvable by DNS and accessible by Let’s Encrypt servers on ports 80 and 443. If the network configurations are not properly set up, the certificate generation will fail.
Next, the installer asks if you want to add any additional full names to the certificate.
Fill in the field if necessary and proceed. You can monitor the certificate generation and installation process, as shown in the image below:
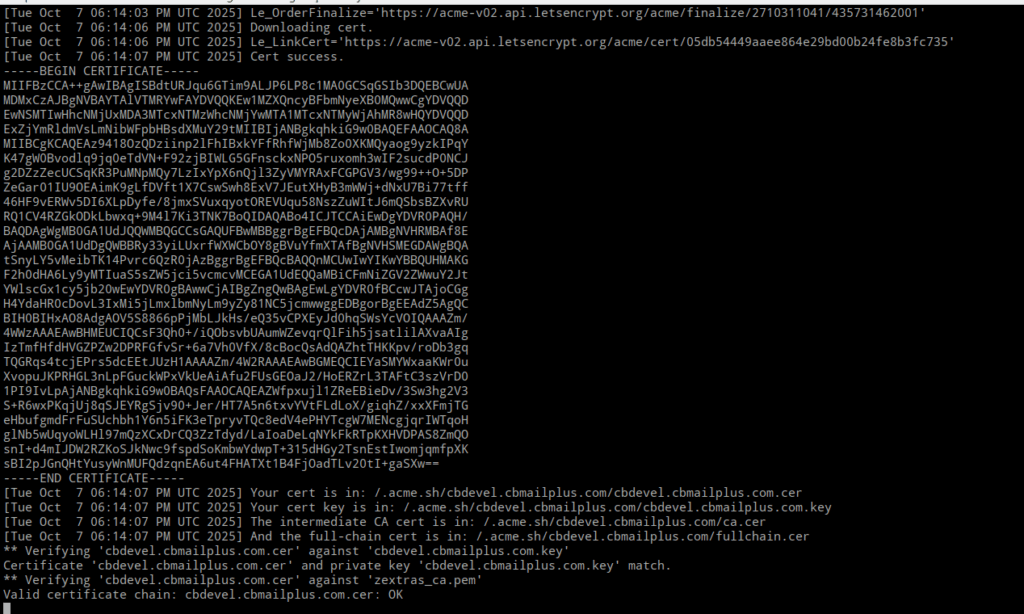
It is important to clarify that this process may fail due to reasons beyond the CbPlus installer’s control. Let’s Encrypt servers might be overloaded, there could be DNS errors, or network failures may happen.
If the message “ERROR 972” appears, it indicates that the certificate was not generated. Wait a few minutes and try again.
Installation completed, but configuration in the cbplus.conf file is still required.
cbplus.conf
This file contains the details of the Carbonio CE Multi-Server deployment and must be configured with great care and understanding. Therefore, let’s discuss the options within it and how it provides us with extensive flexibility to handle various scenarios, ranging from the standard 5-servers config outlined in the Zextras documentation to custom configurations.
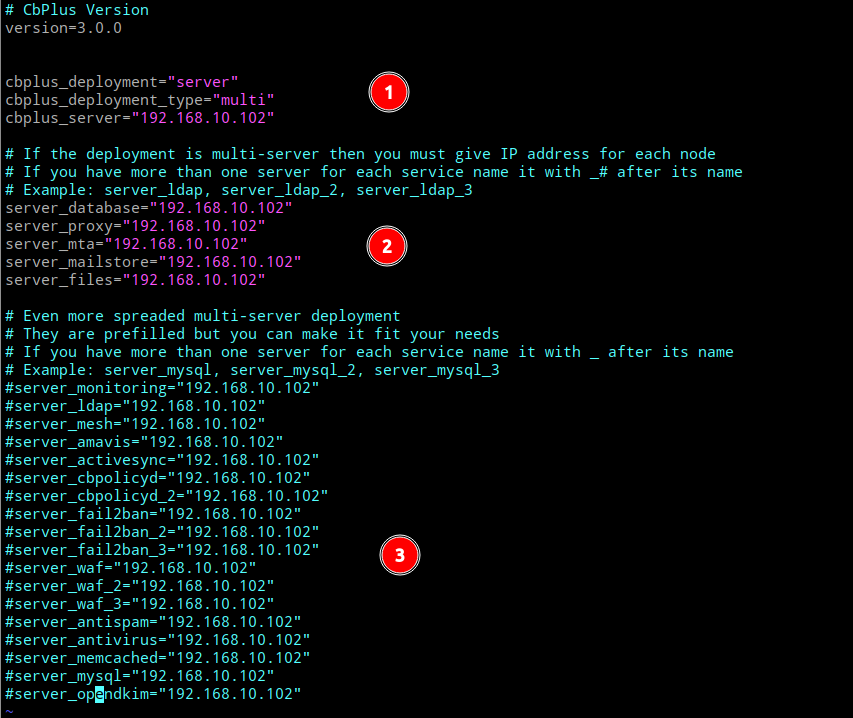
The image above shows an example of a default cbplus.conf file from a freshly installed CbPlus Server. In the first section, you’ll find the information provided during the installation: This is a CbPlus Server, in a Multi-Server deployment, and the server’s IP address.
In the second section, there are variables containing the names of the 5 servers from a standard Multi-Server Carbonio CE installation, following the official Zextras documentation. To make it as clear as possible:
Server1 = server_database
Server2 = server_proxy
Server2 = server_mta
Server3 = server_mailstore
Server4 = server_files
You will notice that in the list above, there is no Server5 and that Server2 is repeated in the server_proxy and server_mta variables. This is because CbPlus does not yet manage Chat or Video services, so there is no need for a Server5. The duplication of Server2 serves to clearly indicate that, although the CbPlus Server is installed on the Proxy server, it can manage multiple separate MTA servers. In fact, this is a quite common scenario in large environments.
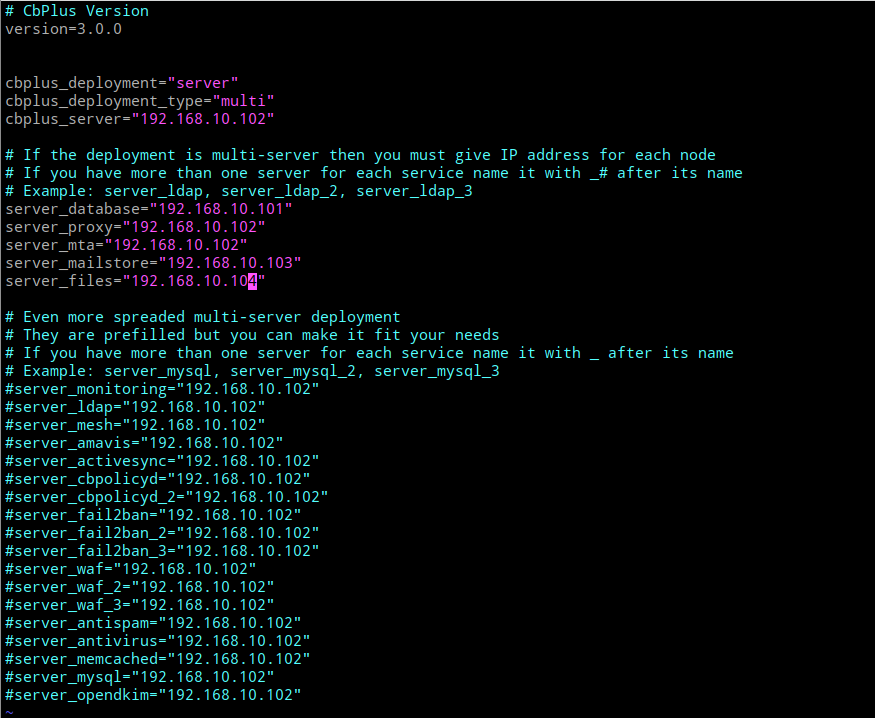
With this understanding, carefully and attentively define the IP addresses for each server.
In the third section, we present possible names for servers separated by service type: monitoring, ldap, mesh, amavis, activesync, cbpolicyd, fail2ban, waf, antispam, memcached, mysql, and opendkim.
The list is extensive and illustrates how granular your deployment can be, while still allowing CbPlus to manage it effectively.
An important point to note is that variables can be suffixed with “_2”, “_3”, “_4”, and so on, to define multiple servers for the same service. For example:
server_mta
server_mta_2
server_mta_3
In this case, CbPlus will understand that there are 3 MTA servers, each with its own IP address. This is how CbPlus knows it must execute MTA-related commands on all servers in the deployment.
Therefore, this implies that when adding or removing a Node to your Carbonio CE deployment, you must make the corresponding changes in the cbplus.conf file.
Completing the CbPlus Server configuration would look like this:
CbPlus Node Installation
In order to install the second component, the Node, access each of the remaining servers in your Carbonio CE deployment, which, in this scenario, will be Server1, Server3, and Server5. Download CbPlus normally and extract it to “/opt”.
Add your license key to the token.conf file, which should look something like this:
token=Adfr46sdadJKuTTZ1HGGD9EissOPoxY7bNRqThen execute the install command.
./install
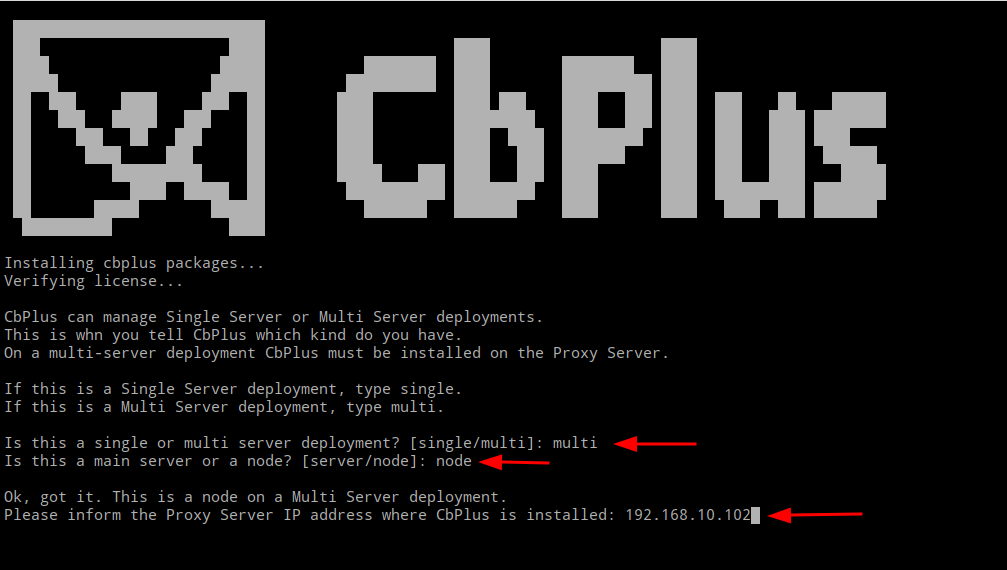
Answer the first question with “multi” and the second with “node”, after all, this is a “Node” of the multi-server deployment.
Next, provide the IP address of the server where the CbPlus Server is installed, which should be the same as the Proxy server in your deployment.
And that’s it! There’s no need to modify the cbplus.conf file, as it is copied from the CbPlus Server. You will only need to edit the cbplus.conf file in the event of an IP address change for any server in the environment, or when adding or removing a server. Reiterating: in case of changes, additions, or removals of servers, it is necessary to update the cbplus.conf file on all servers where it is installed.
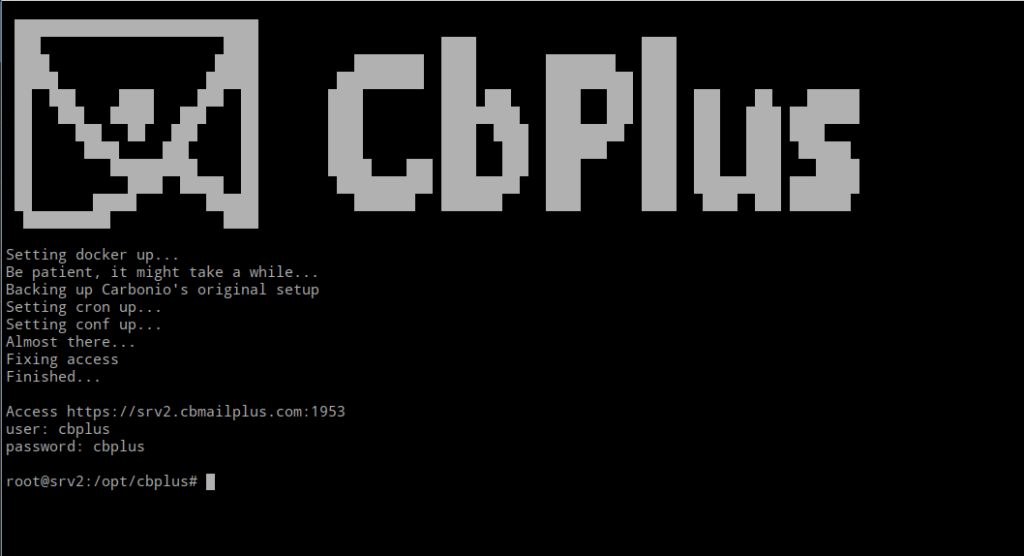
Finishing Up
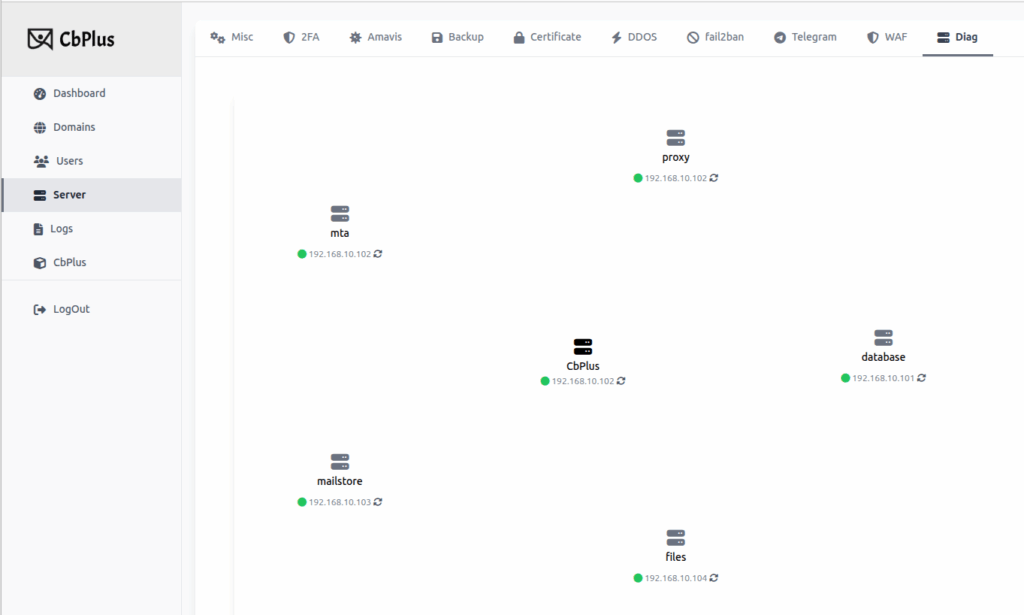
With all the steps above completed, access CbPlus via the URL of your server on port 1953, using the default username “cbplus” and the default password “cbplus”. It is highly recomended to change the password at the first access from the CbPlus menu.
Then the map with all your servers can be viewed in the Diag tab under the Server menu.